プロジェクトに新しいディレクトリを追加
新しいディレクトリを追加するとき
① 実際のファイルシステム上でデレクトリを作る
② xcode上で新しいグループを作る。
③ xcode右側 file inspector でlocationの下、ディレクトリマークをクリックして、作成したグループとファイルシステム上のディレクトリを結びつける
④ ファイルを新規で作成する場合は、クラス名をつけた後、ディレクトリを指定することを忘れない。
⑤ 新しく作ったディレクトリに入れたいファイルがすでに作成済みの場合。まずファイルシステム上でファイルをディレクトリに移動
⑥ xcode上でファイル名が赤く表示されるのでデリートする。
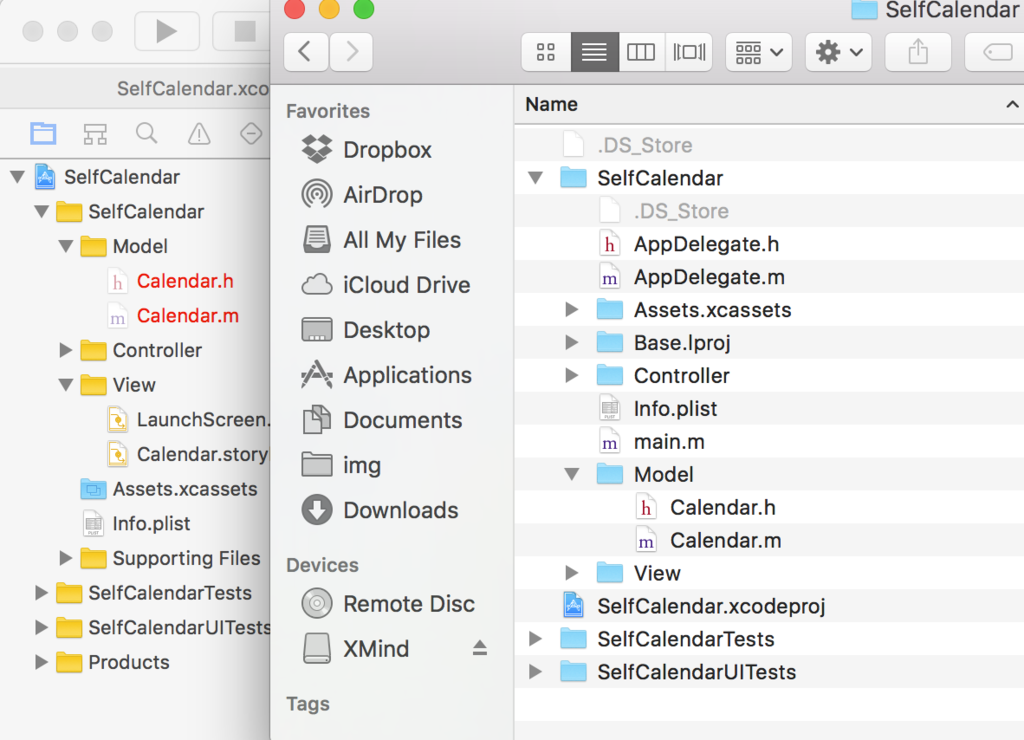
⑦ファイルシステムからドラッグアンドドロップでxcodeのproject navigator に追加。
日付の処理+カレンダーを作る時のポイント
日付処理の検証
年、月、日付をそれぞれ別にして取得したい場合 - (NSDateComponents )components:(NSCalendarUnit)unitFlags fromDate:(NSDate )date;メソッドを使う
解説 - (NSDateComponents *)components:(NSCalendarUnit)年 | 月 | 日 | fromDate:年月日を取り出したい日付;
//今日の日付を取得したい場合
NSDate *today = [NSDate date];</br>
###日付の処理

NSDateComponents *components = [[NSCalendar currentCalendar] components:NSCalendarUnitYear|NSCalendarUnitMonth|NSCalendarUnitDay fromDate:today];


    NSLog(@"today : %@",today);

    NSLog(@"day   :%ld",components.day);

    NSLog(@"month :%ld",components.month);

    NSLog(@"year  :%ld: ",components.year);
結果
2017-04-09 20:54:59.683 myCalendar[40300:2824145] today : 2017-04-09 11:54:59 +0000
2017-04-09 20:54:59.684 myCalendar[40300:2824145] day   :9
2017-04-09 20:54:59.684 myCalendar[40300:2824145] month :4
2017-04-09 20:54:59.684 myCalendar[40300:2824145] year  :2017:
上記作成したcomponentsの年月日をしてしてみる
components.day = 1;

NSDate *whichDateOfMonth = [[NSCalendar currentCalendar] dateFromComponents:components];
    NSLog(@"%@",whichDateOfMonth);
結果
2017-04-09 20:54:59.683 myCalendar[40300:2824145] 2017-03-31 15:00:00 +0000
そして次の場合
components.day = 20;
components.month = 5;

NSDate *whichDateOfMonth = [[NSCalendar currentCalendar] dateFromComponents:components];
    NSLog(@"%@",whichDateOfMonth);
結果
2017-04-09 20:54:59.683 myCalendar[40300:2824145] 2017-05-19 15:00:00 +0000
NSDate *whichDateOfMonth = [[NSCalendar currentCalendar] dateFromComponents:components]; NSLog(@“%@”,whichDateOfMonth);
その月の日数を取得する
NSInteger numberOfWeeks = [[NSCalendar currentCalendar] rangeOfUnit:NSCalendarUnitWeekOfDay //日 inUnit:NSCalendarUnitMonth//月の forDate:firstDateOfMonth //この日を含む].length //数;
メソッドの訳(この日を含む月の中の日数をNSIntegerで取り出して)


[カレンダーを作る]()にアクセスしてますか?
###カレンダーを作る時
1.今日の日付を取得</br>
2.今日の日付を年、月、日というように要素ごとに取り出す
3.今月が何日から始まるかを取得(普通に一日)</br>


2. 上記 - (NSDateComponents *)components:(NSCalendarUnit)unitFlags fromDate:(NSDate *)date;メソッドを使う</br></br>

解説</br>
- (NSDateComponents *)components:(NSCalendarUnit)年 | 月 | 日 | fromDate:年月日を取り出したい日付;
[[NSCalendar currentCalendar] dateFromComponents:];
CollectionViewのカスタムセル
まず、controllerViewのクラス名変更したらストーリーボードも変更することを忘れない
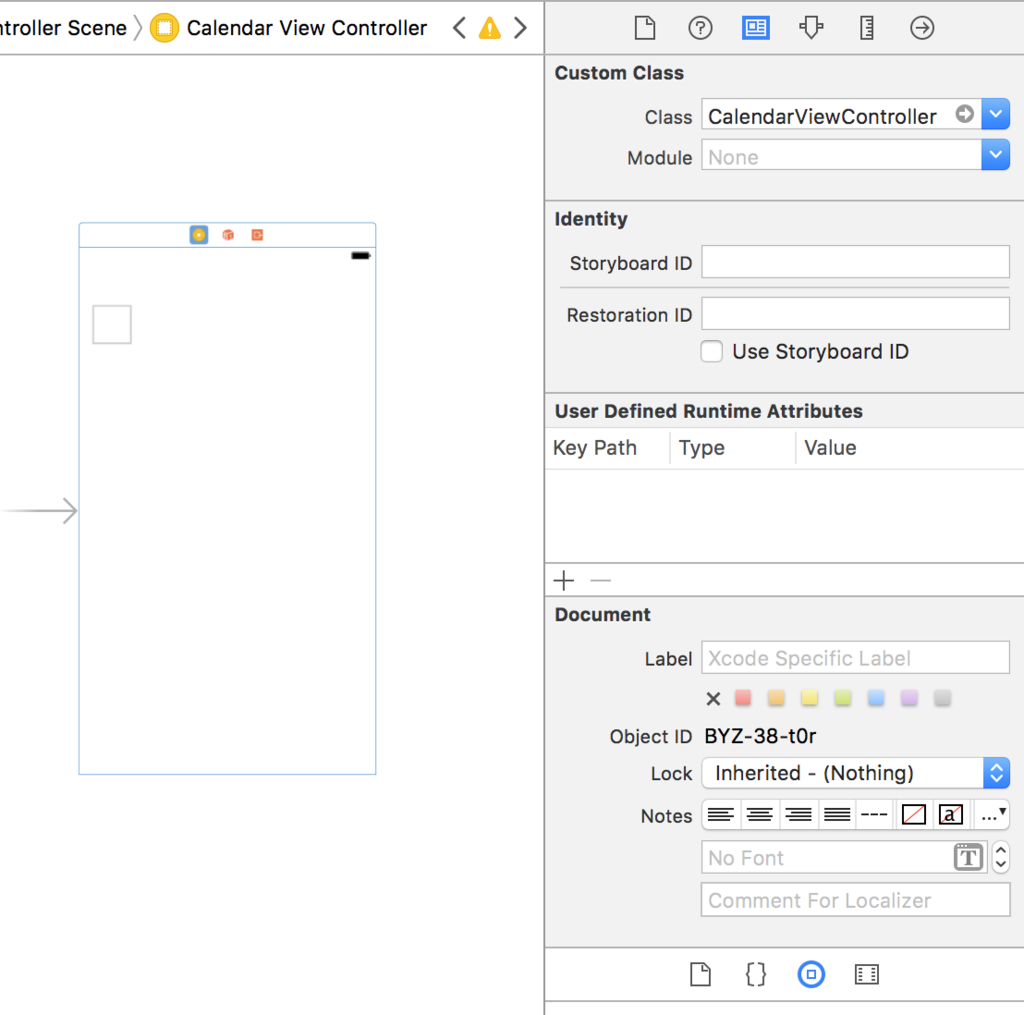
collectionViewをはったらヘッダーファイルと紐付け
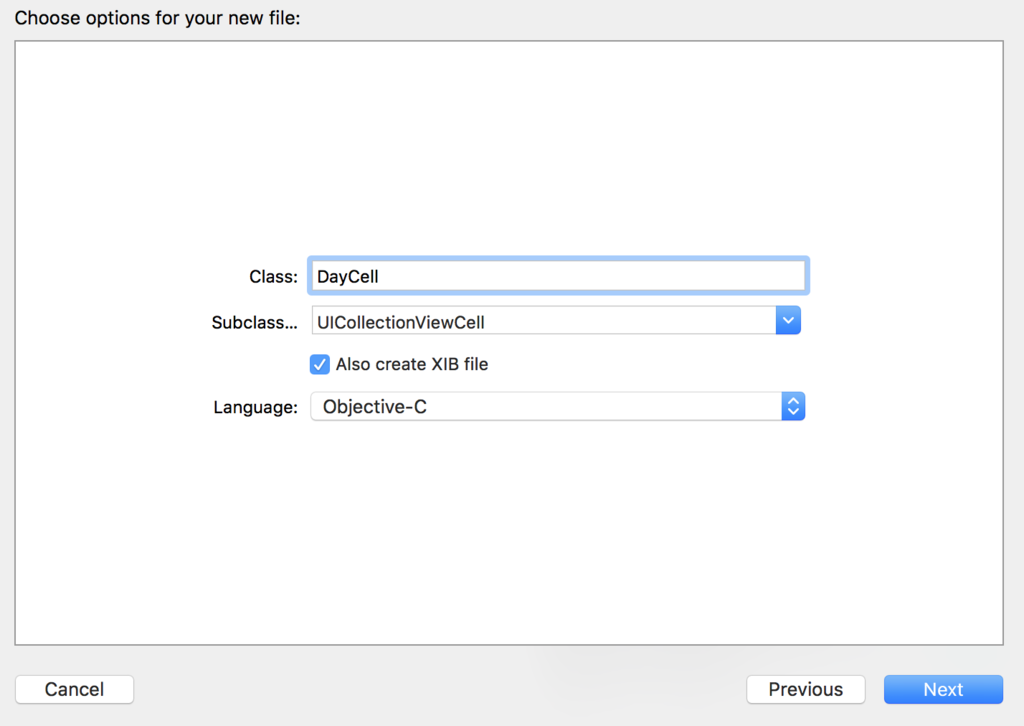
 xibファイルもセットで新しいUICollectionViewCellクラスのファイルを作る
ストーリボードでクラス名とセルのIdentiferを設定する
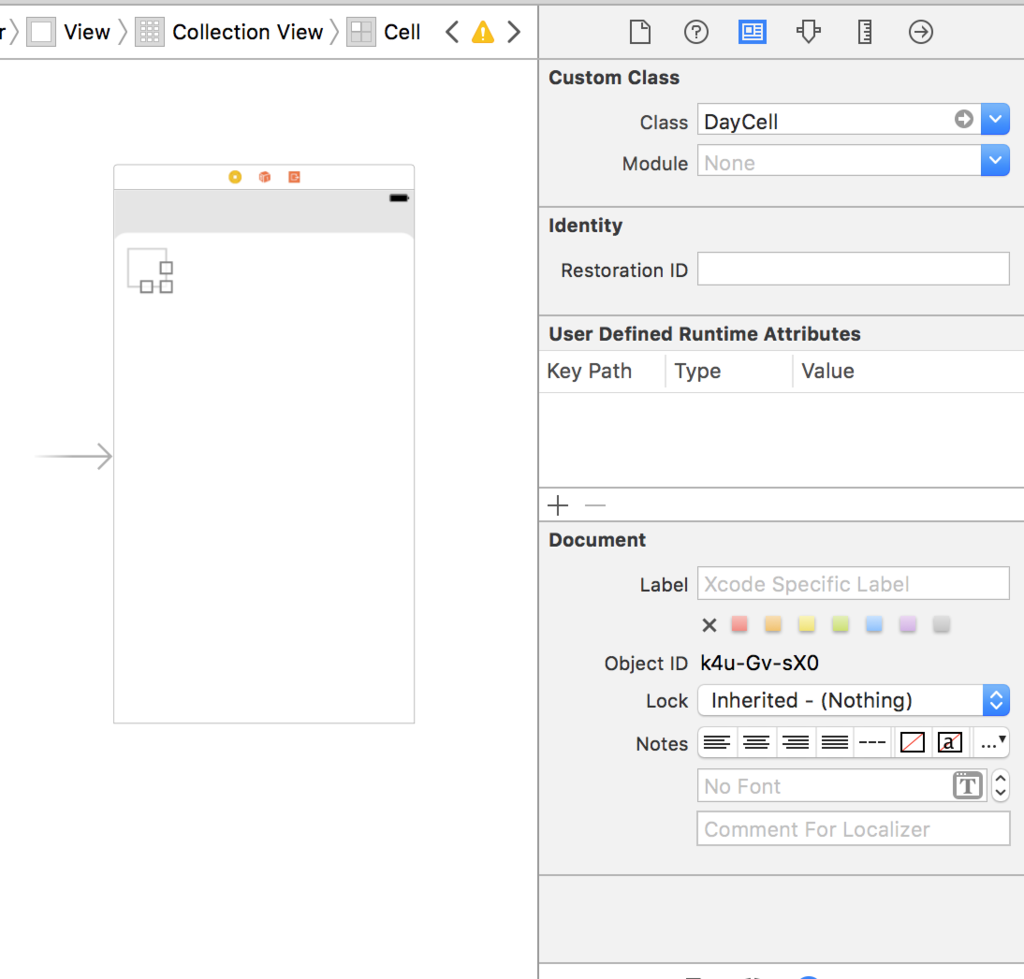

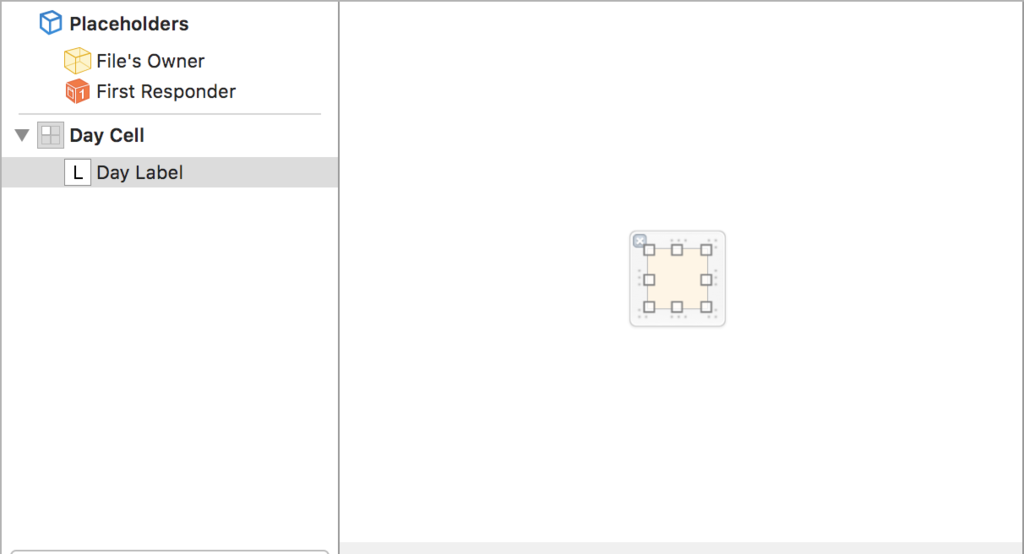
xibファイルはこんな感じでラベルをつけてDayCell.hに紐付けしておく
コードの実装
- (void)viewDidLoad {
    [super viewDidLoad];
    // Do any additional setup after loading the view, typically from a nib.

    rows = @[@"あ",@"い",@"う"];

    //xibファイルのセルを(UICollectionCellクラスのファイル生成時に作ったのでxibファイルはUICollectionCellと元々結びついている)ストーリボードのセルと結びつける
    UINib *nib = [UINib nibWithNibName:@"DayCell" bundle:nil];
    [self.collectionView registerNib:nib forCellWithReuseIdentifier:@"Cell"];
}
- (NSInteger)collectionView:(UICollectionView *)collectionView numberOfItemsInSection:(NSInteger)section
{
    return rows.count;;
}


- (UICollectionViewCell *)collectionView:(UICollectionView *)collectionView cellForItemAtIndexPath:(NSIndexPath *)indexPath
{

//セルのインスタンス生成しストーリーボードのセルと結びつける
 DayCell *cell = [collectionView dequeueReusableCellWithReuseIdentifier:@"Cell" forIndexPath:indexPath];

//    DayCell *cell = [collectionView dequeueReusableCellWithIdentifier:cellName
//                                                       forIndexPath:indexPath];

    // カスタムセルのラベルに値を設定
    cell.dayLabel.text = rows[indexPath.row];

    return cell;

    /* 標準Cellを使用する場合
     NSString *cellName = NSStringFromClass([UICollectionViewCell class]);
     UICollectionViewCell *cell = [collectionView dequeueReusableCellWithReuseIdentifier:cellName forIndexPath:indexPath];
     return cell;
     */
}
このように、①xibとストーリーボード結びつけ、viewControllerで生成したUICollectionViewのインスタンスとストーリーボードのセルの結びつけという2段階。
結果

参考: tableViewの場合
データベースの書き方(FMDB)
データベース接続
- (FMDatabase *)getConnection
{
    if( self.db_path == nil )
    {
        self.db_path =  [このクラス getDbFilePath];   //このクラスのクラスメソッド
    }

    return [FMDatabase databaseWithPath:self.db_path];
}
+ (NSString*)getDbFilePath
{
    NSArray*  paths = NSSearchPathForDirectoriesInDomains( NSDocumentDirectory, NSUserDomainMask, YES );
    NSString* dir   = [paths objectAtIndex:0];

    return [dir stringByAppendingPathComponent:@"todo.db"]; //データベースのファイル名
}
そしてDBクラスのインスタンス生成時に自動でDBに接続できるようにイニシャライザで設定しておく
- (id)init
{
    self = [super init];
    if( self )
    {
        FMDatabase* db = [self getConnection];
        [db open];
        [db executeUpdate:_createDB];
        [db close];
    }

    return self;
}
_createDBの部分は定数で定義してある
static NSString *const createDB = @"@"CREATE TABLE IF NOT EXISTS t_todo (id INTEGER PRIMARY KEY AUTOINCREMENT, title TEXT, contents TEXT, limit_date DATE);"
DBから値の取り出し
①select文で値を取り出すとき ②NSMutableArray型の変数生成 ③while文でモデルオブジェクトクラスのプロパティに値を格納 ④NSMutableArrayに格納 ⑤db close 忘れない
FMDatabase* db = [self getConnection];
    [db open];

    FMResultSet*    results = [db executeQuery:@"SELECT id, title, date FROM t_todo" ];
    NSMutableArray* todos = [[[NSMutableArray alloc] initWithCapacity:0] autorelease];

    while( [results next] )
    {
        ToDo* todo      = [[Book alloc] init];
            todo.todoId      = [results intForColumnIndex:0];
            todo.title          = [results stringForColumnIndex:1];
            todo.contents  = [results stringForColumnIndex:2];
            todo.date = [results dateForColumnIndex:3];

        [todos addObject:todo];

    }

    [db close];