AutoLayout1
AutoLayoutのポイント
・Constraintsを設定する前に、だいたいの大きさや位置はpreviewで設定しておく。そうしないと、Constraints変になる
①全画面にimageViewを表示する
UIImageViewを選択した状態で、add new constraintsを選択する。
Marginを上下左右0に設定。Add 4 Constrainsを押すのを忘れずに。
 黄色いボタンwarning button が出たら、previewとconstraintsがずれているという意味。
 黄色い部分をクリック。Fix Missplacemantをクリックする

②ボタンやラベルを高さ50で3つ重ねる場合
それぞれのボタンで同じように設定すれば0K

③ボタンの高さと幅を同じ割合で配置

Aspect Ratioにチェックを入れる

Multiplierの所でwidth:heightで設定できる

④中央に以下のように、画面中央に、画面幅の60%の幅で、ボタンを配置する

まずは中央に配置

buttonを押した状態で、controlを押しながら、viewと結びつけ、まずはEqual Widthsにチェック

Multiplierで0.6に設定

図だと一応Aspect Ratioも設定している

⑤複数のボタンを上から100ピクセルの位置に、同じ幅で3つ配置する。ボタンの高さは50ピクセル

まず基準となるbuttonのConstraintsを設定

2番目のbuttonの設定

最後のbuttonの設置
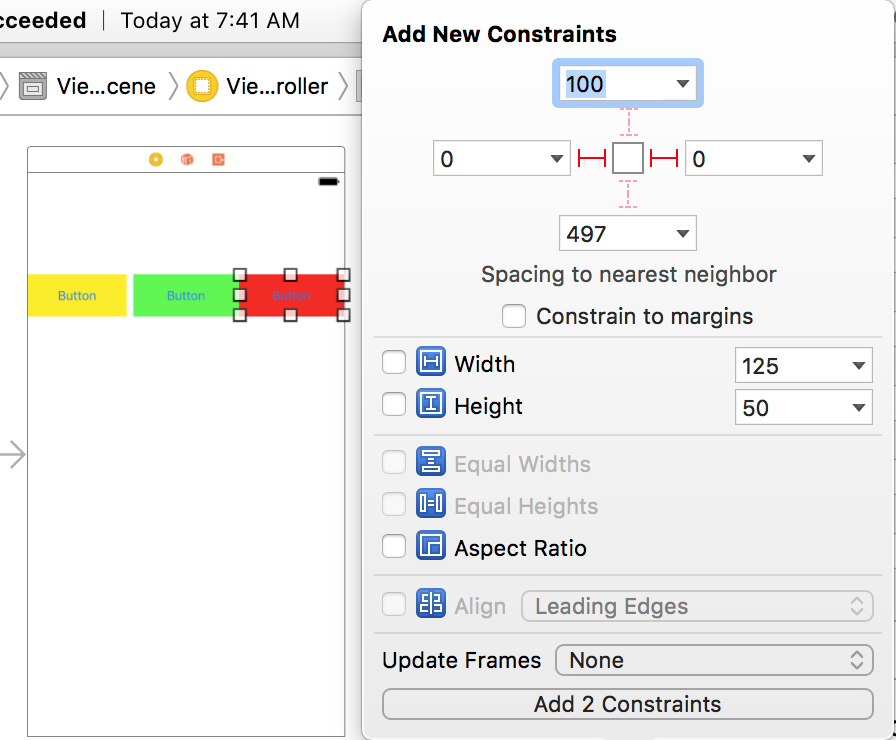
赤、緑、黄色の順でクリックし高さと幅を基準(黄色)に合わせる

最後に3つのbuttonの中心が基準と同じになるように設定

デバイスのディレクトリパスとNSFileManager
データをどのディレクトリに入れるかを整理する。
・cachesディレクトリ
このディレクトリ下のデータは、アプリがアクティブの時でも削除される可能性がある
・tmpディレクトリ
このディレクトリ下のデータは、 アプリがアクティブの時は保持され続ける
・Documentsディレクトリ
このディレクトリ下のデータは、アプリがアンインストールされない限り保持され続ける
参考 [http://qiita.com/zck/items/9d087d498ce711b22c04:title]
tmpディレクトリまでのパス
NSString *tmpDirPath = NSTemporaryDirectory();
cachesディレクトリまでのパス
NSArray *paths = NSSearchPathForDirectoriesInDomains(NSDocumentDirectory, NSUserDomainMask, YES);
    NSString *DocumentsDirPath = [paths objectAtIndex:0];
Documentsディレクトリまでのパス
NSArray *paths = NSSearchPathForDirectoriesInDomains(NSCachesDirectory, NSUserDomainMask, YES);
NSString *cachesDirPath = [paths objectAtIndex:0];
ファイルを保存したり、管理する場合、通常これらどのディレクトリにしても配下に新しいディレクトリを用意して管理することになる。 そこでNSFileManagerを使用して、新しいディレクトリを作り、imageファイルを保存する方法をおさらい
今回は、Documentsディレクトリ配下にsampleDirectoryというディレクトリを作る。
viewdidloardとかに Asset catalogで指定した画像をimageに入れる(Asset catalogに入れた場合、画像は消去してok)
UIImage *image = [UIImage imageNamed: @"dog"];
    NSData *imageData = UIImagePNGRepresentation(image);
ディレクトリ作成の前に新しく作るディレクトリまでのpathを取得する。
NSString *newDocumentsDirPath = [DocumentsDirPath stringByAppendingPathComponent:@"sampleDirectory"];
この時点ではまだpathを取得しただけ。実際にディレクトリは存在しない
NSFileManager *fileManager = [NSFileManager defaultManager];
    NSError *error = nil;

//ディレクトリを作る
    BOOL created = [fileManager createDirectoryAtPath:newDocumentsDirPath withIntermediateDirectories:YES attributes:nil error:&error];

    if(!created){

        NSLog(@"作れなかったよ");
    }
stringByAppendingPathComponentメソッドを使用して、ディレクトリ配下にdog.igoファイルを追加したpathを取得しwriteToFileメソッドでファイルを書き込む
NSString *filePath =  [newDocumentsDirPath stringByAppendingPathComponent:@"dog.igo"];

[imageData writeToFile:filePath atomically:YES];

 ```
自作アプリのUrlスキーマを設定
自作アプリをサファリなどの他のアプリから開く
プロジェクトのターゲットをクリック URL Types で設定 identifier と URL Schemes を設定。Identifierは Bundle Identifierと同じで良い
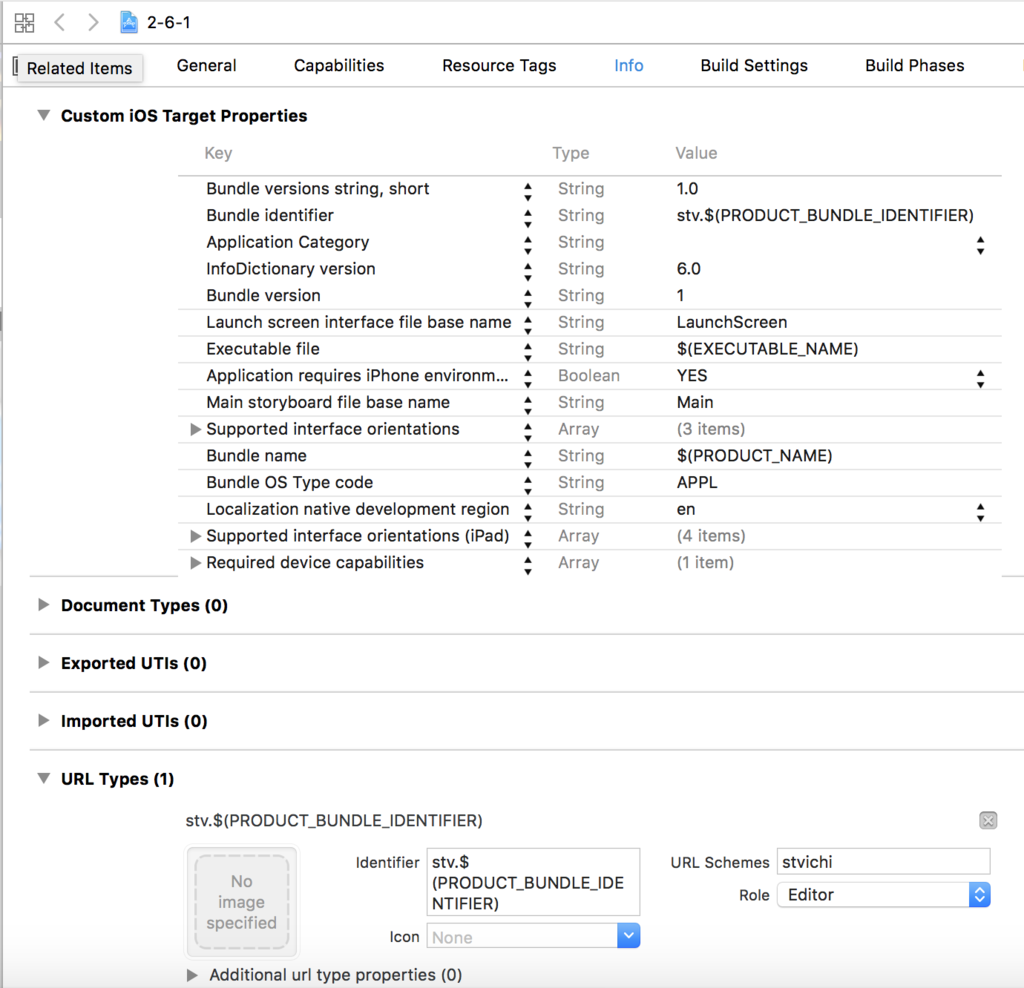
plistには自動で値が入る

開くときは、設定したUrl Scheme://で開く。 例 stvichi://
プロジェクトに新しいディレクトリを追加
新しいディレクトリを追加するとき
① 実際のファイルシステム上でデレクトリを作る
② xcode上で新しいグループを作る。
③ xcode右側 file inspector でlocationの下、ディレクトリマークをクリックして、作成したグループとファイルシステム上のディレクトリを結びつける
④ ファイルを新規で作成する場合は、クラス名をつけた後、ディレクトリを指定することを忘れない。
⑤ 新しく作ったディレクトリに入れたいファイルがすでに作成済みの場合。まずファイルシステム上でファイルをディレクトリに移動
⑥ xcode上でファイル名が赤く表示されるのでデリートする。
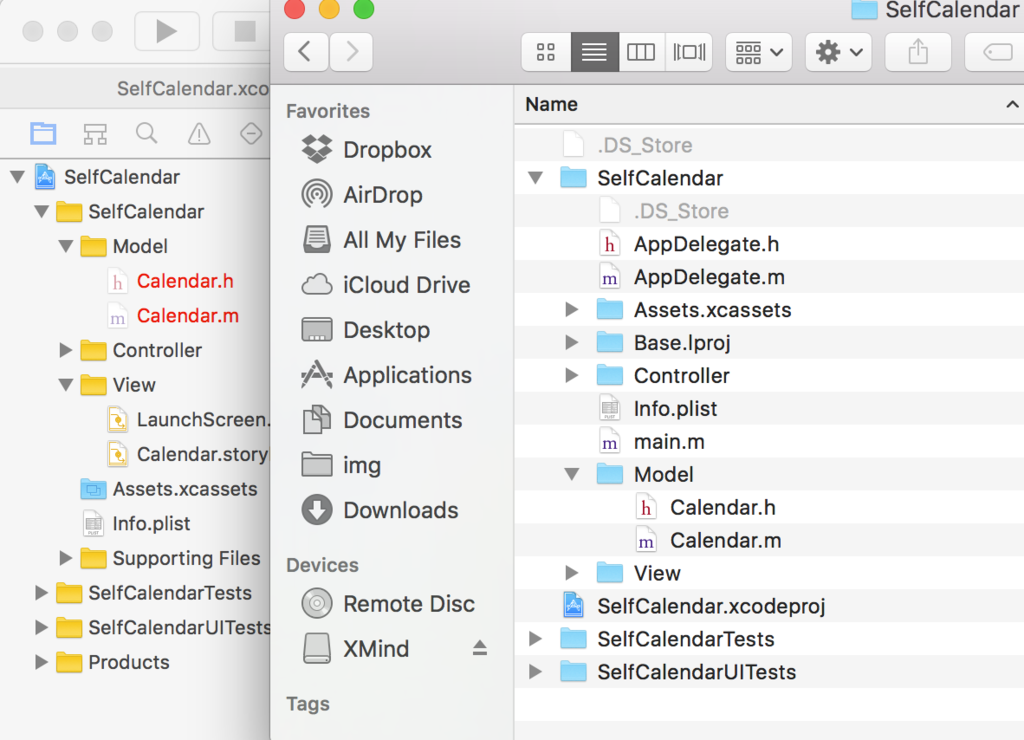
⑦ファイルシステムからドラッグアンドドロップでxcodeのproject navigator に追加。
日付の処理+カレンダーを作る時のポイント
日付処理の検証
年、月、日付をそれぞれ別にして取得したい場合 - (NSDateComponents )components:(NSCalendarUnit)unitFlags fromDate:(NSDate )date;メソッドを使う
解説 - (NSDateComponents *)components:(NSCalendarUnit)年 | 月 | 日 | fromDate:年月日を取り出したい日付;
//今日の日付を取得したい場合
NSDate *today = [NSDate date];</br>
###日付の処理

NSDateComponents *components = [[NSCalendar currentCalendar] components:NSCalendarUnitYear|NSCalendarUnitMonth|NSCalendarUnitDay fromDate:today];


    NSLog(@"today : %@",today);

    NSLog(@"day   :%ld",components.day);

    NSLog(@"month :%ld",components.month);

    NSLog(@"year  :%ld: ",components.year);
結果
2017-04-09 20:54:59.683 myCalendar[40300:2824145] today : 2017-04-09 11:54:59 +0000
2017-04-09 20:54:59.684 myCalendar[40300:2824145] day   :9
2017-04-09 20:54:59.684 myCalendar[40300:2824145] month :4
2017-04-09 20:54:59.684 myCalendar[40300:2824145] year  :2017:
上記作成したcomponentsの年月日をしてしてみる
components.day = 1;

NSDate *whichDateOfMonth = [[NSCalendar currentCalendar] dateFromComponents:components];
    NSLog(@"%@",whichDateOfMonth);
結果
2017-04-09 20:54:59.683 myCalendar[40300:2824145] 2017-03-31 15:00:00 +0000
そして次の場合
components.day = 20;
components.month = 5;

NSDate *whichDateOfMonth = [[NSCalendar currentCalendar] dateFromComponents:components];
    NSLog(@"%@",whichDateOfMonth);
結果
2017-04-09 20:54:59.683 myCalendar[40300:2824145] 2017-05-19 15:00:00 +0000
NSDate *whichDateOfMonth = [[NSCalendar currentCalendar] dateFromComponents:components]; NSLog(@“%@”,whichDateOfMonth);
その月の日数を取得する
NSInteger numberOfWeeks = [[NSCalendar currentCalendar] rangeOfUnit:NSCalendarUnitWeekOfDay //日 inUnit:NSCalendarUnitMonth//月の forDate:firstDateOfMonth //この日を含む].length //数;
メソッドの訳(この日を含む月の中の日数をNSIntegerで取り出して)


[カレンダーを作る]()にアクセスしてますか?
###カレンダーを作る時
1.今日の日付を取得</br>
2.今日の日付を年、月、日というように要素ごとに取り出す
3.今月が何日から始まるかを取得(普通に一日)</br>


2. 上記 - (NSDateComponents *)components:(NSCalendarUnit)unitFlags fromDate:(NSDate *)date;メソッドを使う</br></br>

解説</br>
- (NSDateComponents *)components:(NSCalendarUnit)年 | 月 | 日 | fromDate:年月日を取り出したい日付;
[[NSCalendar currentCalendar] dateFromComponents:];
CollectionViewのカスタムセル
まず、controllerViewのクラス名変更したらストーリーボードも変更することを忘れない
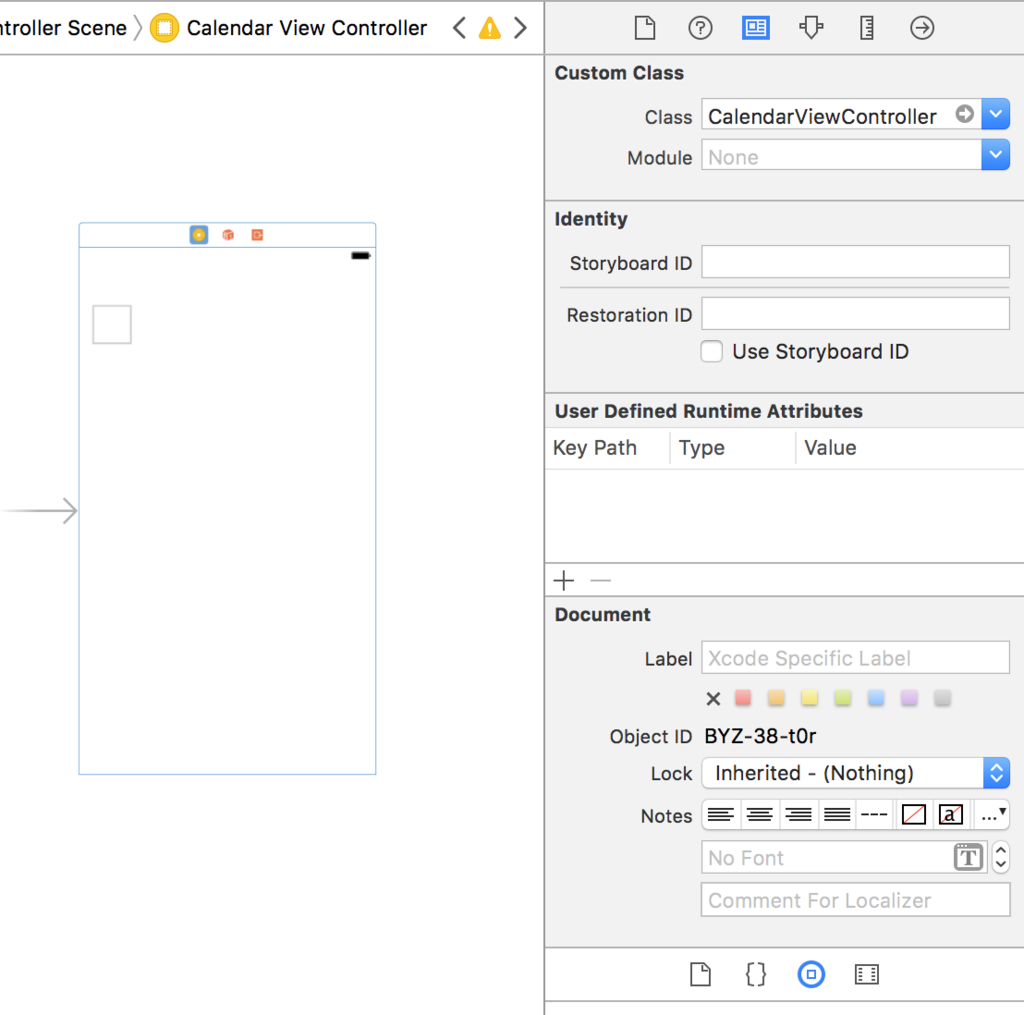
collectionViewをはったらヘッダーファイルと紐付け
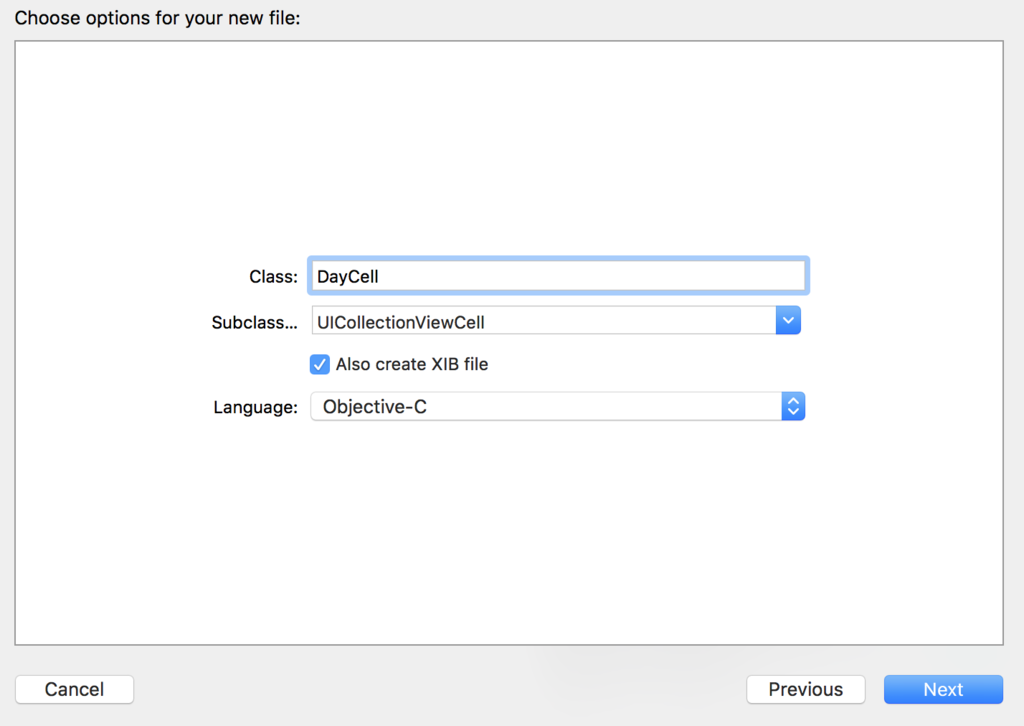
 xibファイルもセットで新しいUICollectionViewCellクラスのファイルを作る
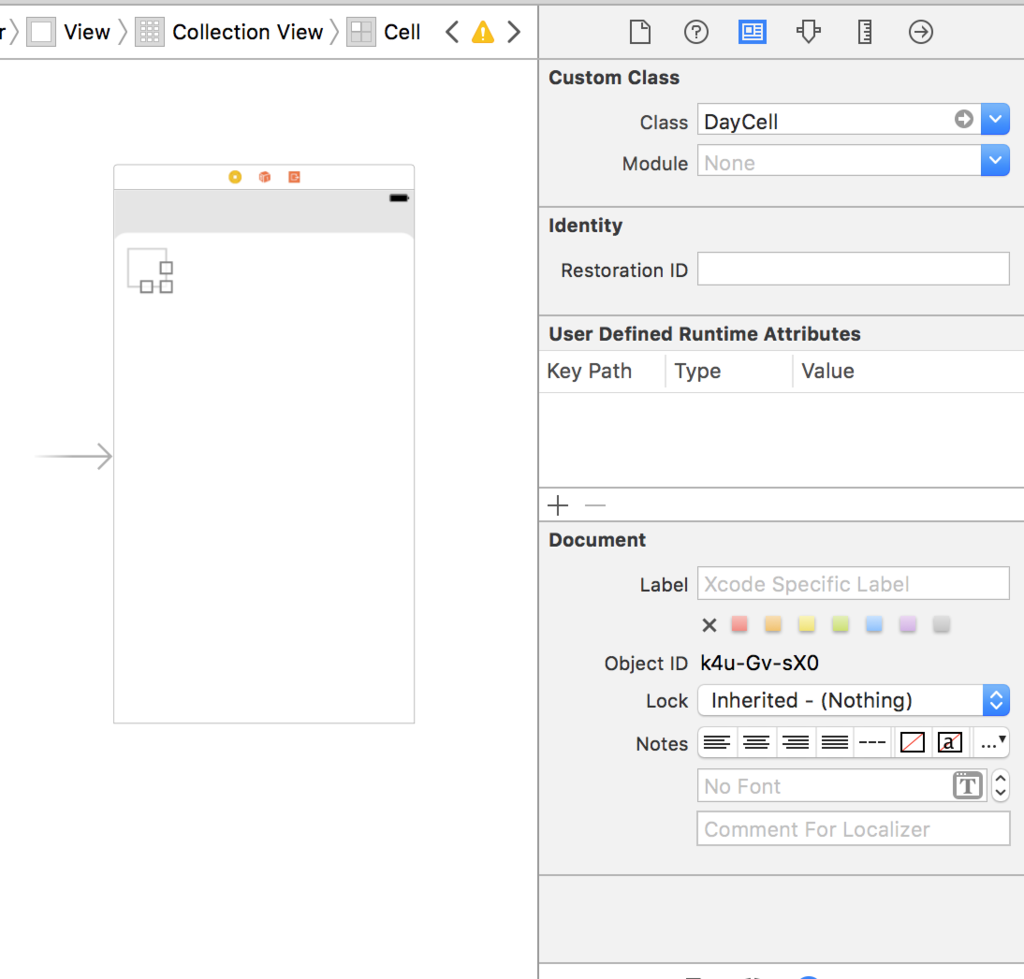
ストーリボードでクラス名とセルのIdentiferを設定する

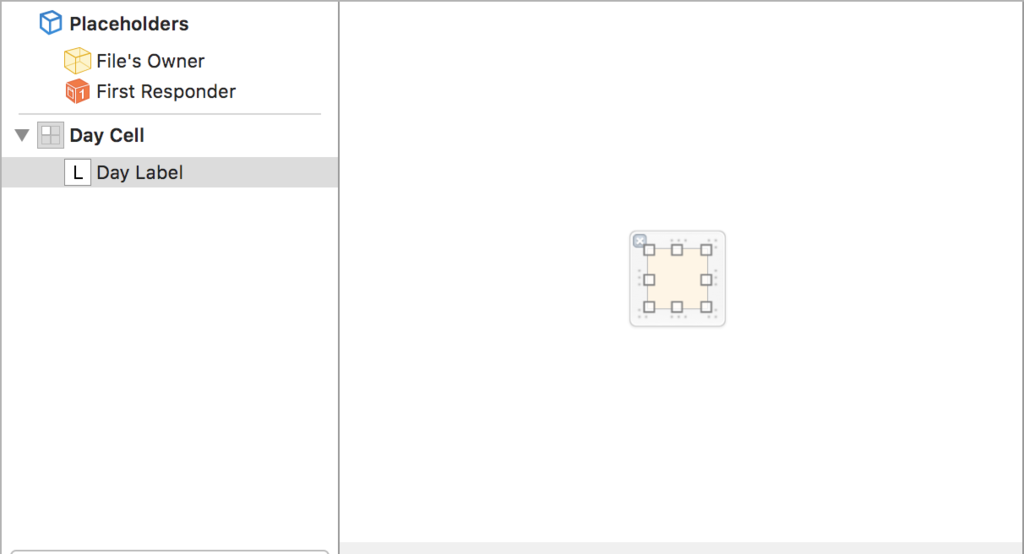
xibファイルはこんな感じでラベルをつけてDayCell.hに紐付けしておく
コードの実装
- (void)viewDidLoad {
    [super viewDidLoad];
    // Do any additional setup after loading the view, typically from a nib.

    rows = @[@"あ",@"い",@"う"];

    //xibファイルのセルを(UICollectionCellクラスのファイル生成時に作ったのでxibファイルはUICollectionCellと元々結びついている)ストーリボードのセルと結びつける
    UINib *nib = [UINib nibWithNibName:@"DayCell" bundle:nil];
    [self.collectionView registerNib:nib forCellWithReuseIdentifier:@"Cell"];
}
- (NSInteger)collectionView:(UICollectionView *)collectionView numberOfItemsInSection:(NSInteger)section
{
    return rows.count;;
}


- (UICollectionViewCell *)collectionView:(UICollectionView *)collectionView cellForItemAtIndexPath:(NSIndexPath *)indexPath
{

//セルのインスタンス生成しストーリーボードのセルと結びつける
 DayCell *cell = [collectionView dequeueReusableCellWithReuseIdentifier:@"Cell" forIndexPath:indexPath];

//    DayCell *cell = [collectionView dequeueReusableCellWithIdentifier:cellName
//                                                       forIndexPath:indexPath];

    // カスタムセルのラベルに値を設定
    cell.dayLabel.text = rows[indexPath.row];

    return cell;

    /* 標準Cellを使用する場合
     NSString *cellName = NSStringFromClass([UICollectionViewCell class]);
     UICollectionViewCell *cell = [collectionView dequeueReusableCellWithReuseIdentifier:cellName forIndexPath:indexPath];
     return cell;
     */
}
このように、①xibとストーリーボード結びつけ、viewControllerで生成したUICollectionViewのインスタンスとストーリーボードのセルの結びつけという2段階。
結果

参考: tableViewの場合

